
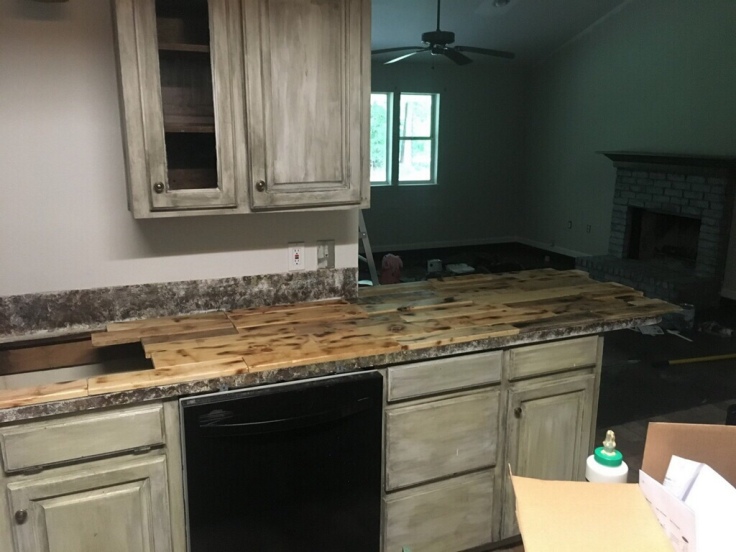
Here’s a project my fiancé and I did in our new home we purchased. The kitchen countertops were super stained up with looked to be old paint and were kind of out dated. I will admit, it was a little harder than what I had anticipated but I feel to be totally worth it!

All the wood used was from FREE pallets.
Supplies:
- 2-3 pallets (depends on size you are working on)
- wood stain and sealer (we used clear)
- jig saw
- power saw
- wood glue
- sander (electric works much better)
- small torch
- pour on high gloss finish
- 2 paint brushes
***NOTE*** PLEASE BE CAREFUL WHEN USING ANY ELECTRICAL TOOLS AND TORCH!! WE RECOMMEND WEARING PROPER PROTECTION WHEN OPERATING DANGEROS TOOLS.
How to:
- Remove sink (If you are working on kitchen)
- Cleaning off countertop
-
- Sand away any old paint or junk left on the old countertop. (you want to have a smooth and even surface) Wipe clean after.
- Cutting your pallets
-
- I found it way easier to just cut the small board spaces in between the frame of the pallets instead of dismembering them. (The parts that don’t have nail)
- After cutting the boards off of your pallet, you are going to want to sand them down to get any overlay they may have and to give it an overall smother feel and look.
- Make sure to wipe all the excess saw dust off so you are working clean.
- Torching Time! (This step is optional and not necessary if you will be applying a dark stain.)
-
- What worked best for us was standing the small bottled torch up and running the board across the flame. Start further away and increase distance for dark burned effects.
- Ensure the boards are all cooled off before handling them.
- Lets start laying out!!
-
- Depending on what type of area you are working on will determine how you will be placing your boards and if there will need to be a lot of measuring and cutting during the process of gluing them down.
- We started by laying our the pallets NOT GLUING YET! (its ok it you overlap sink or countertop; that’s what the jig saw will be used
 You can see on the left side where board are over laying the end of the countertop.
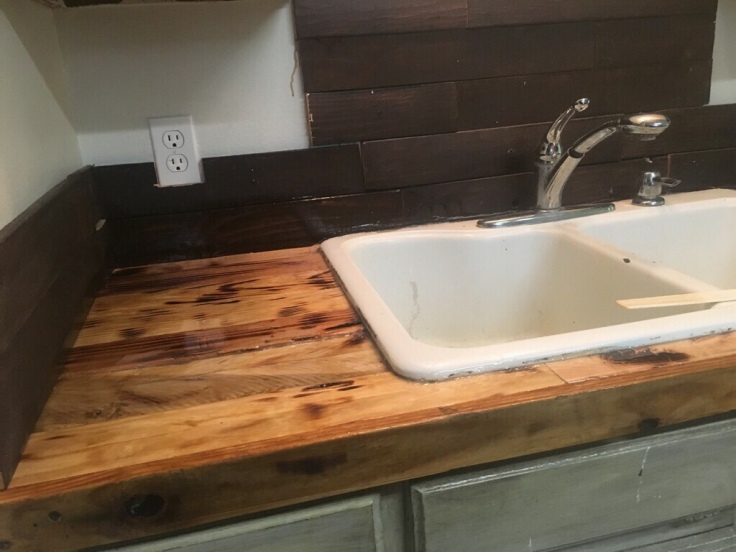
 In this image you can see where the boards are overlapping the sink cut out.
-
- Once you have a basic idea how you want your lay out to look, take your wood glue and put a generous amount on the back of you boards and lay on counter top where you want it to stay.
- Now your finished gluing the boards down, let’s get jiggy (jig saw).
-
- Mark out where your countertop ends and cut the boards flush with that. (same thing goes for the sink opening). Try to get as close as you can to the original counter top without cutting into it. Take your time!
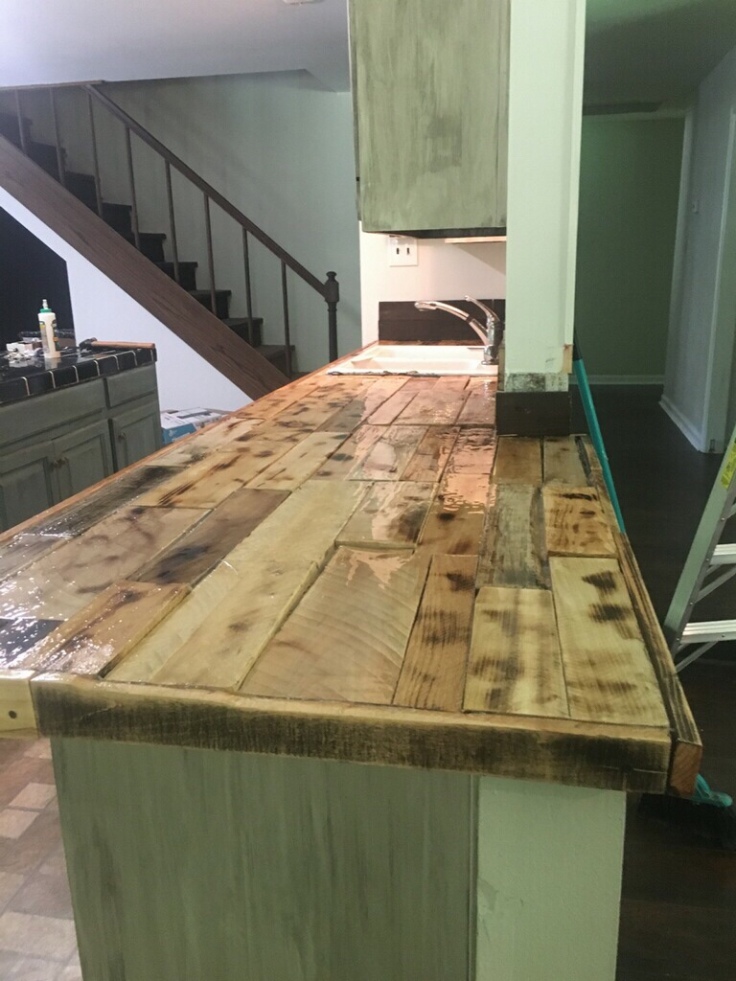
- Staining them bad boys!
- Whatever color stain you choose is fine. (We used a clear stain and x’s 3 protection because it is going to be near water and foods.
- High glass gloss finish
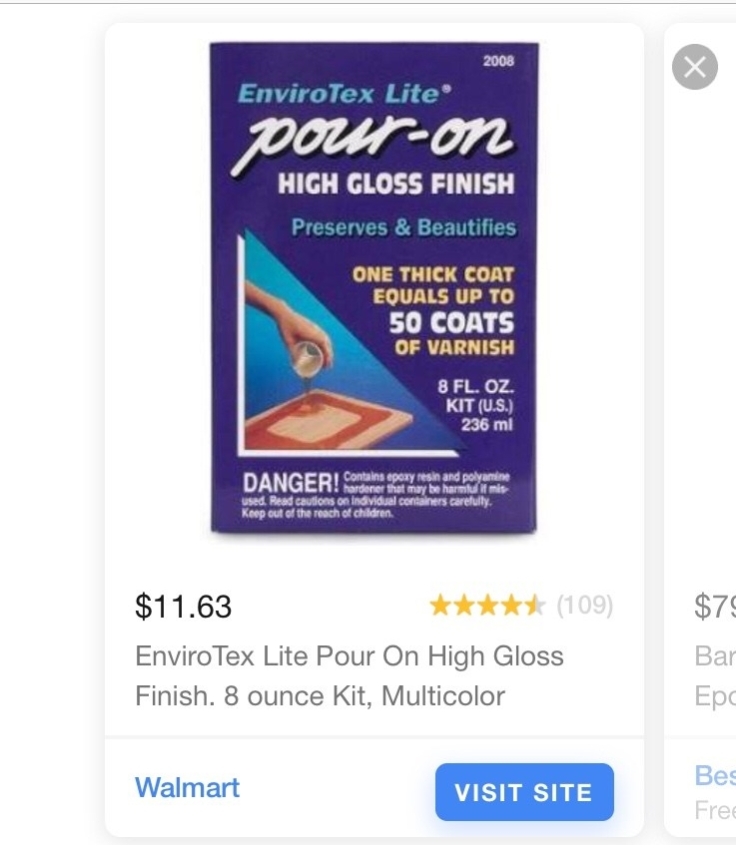
-
- Ok PLEASE PLEASE follow the manufacture directions for this product!!! (I messed up the first time using it 5-6 years ago)
- Mix up the concoction according to your projects size and products directions.
- We let ours fully sit for about 48 hours before even testing our new countertop but WAALLLAAAHHH!!! BEAUTIFUL!!


Now the back wall is not complete yet but we are adding faker pallet boards as a backdrop.

Leave a comment